

Monday, September 12, 2016

Tuesday, August 23, 2016


Monday, July 25, 2016

Monday, March 14, 2016
7 quick clothing fixes while traveling

If
you’re like me, you’ve had dozens of friends think twice before letting you
borrow their clothing because you are fantastic at spilling things on and
snagging some prized pieces.
Never
fear, though. I’ve learned a few things to do in an emergency situation. And
nothing says clothing emergency more than when you’re traveling and only have a
select number of items because you’ve packed smart.
When
you’re at home, you have a lot of things at your disposal for quick fixes, but
when you’re on the run or jumping from plane to bus to airplane, it’s not a
good time for ruining a clothing item.
Having a safety pin
in your purse is a very important item for quick clothing fixes. If your
luggage zipper breaks or the fastener falls off, you can use a safety pin to
reattach. You can also use a safety pin to hold together a hole on a coat,
secure a broken bra strap, and more. Most hotels and b&bs will have a small
sewing kit you could use later. But if you’re at the train stop or hopping on a
plane with and your zipper breaks, you will be glad you brought a safety pin
along.
Bring a safety pin.
Monday, March 7, 2016
Six unexpected things you need for camping

When I
plan an overnight hiking and camping trip, I obviously try to pack as little as
possible. That means it’s easy to leave some of these items off the list, but
you may be surprised how they can come in handy. There are some things that can
make your life a lot easier and you might want to consider packing anyways.
None of these items are too heavy or take up too much space, so bringing them
is an option.
Monday, February 29, 2016
Minimalist travel wardrobe ideas

If you’re not a minimalist regularly, you sort of become one when you travel. The minimalist fashion style is simple and chic. Simple patterns and solid colors can be perfect for travels, and many of these timeless pieces can be used for years.
Many of the minimalist styles are based on standard pieces that you already have in your wardrobe, but if you didn’t, would be a worthwhile investment. Items such as a classic white button down, solid black pants, a little black dress and a trench-style coat are simple and sophisticated and go with almost anything. They can be worn and re-worn throughout the trip.
The combinations for these clothing staples are endless, and would be sure to go with any kind of jewelry, purses or scarfs.
Monday, February 22, 2016
Big cities in North America: Washington D.C.

Monday, February 15, 2016
Big cities in North America: Nashville
Written by Tasha Kitchens

One of my favorite cities is Nashville, aka Music City. From Country Music to Historic Plantations and wineries, from sweet tea to breakfast at the Famous Loveless Cafe, Nashville is sure to please. I've put together some favorites from a local’s perspective. We’ll explore the usual tourist destinations and take a look at some local favorites. Don’t worry, you’re in good hands, my husband is originally from the great Volunteer State!

One of my favorite cities is Nashville, aka Music City. From Country Music to Historic Plantations and wineries, from sweet tea to breakfast at the Famous Loveless Cafe, Nashville is sure to please. I've put together some favorites from a local’s perspective. We’ll explore the usual tourist destinations and take a look at some local favorites. Don’t worry, you’re in good hands, my husband is originally from the great Volunteer State!
Monday, February 8, 2016
Big cities in North America: Niagara Falls

When I asked readers what they wanted to hear last October, one of their suggestions was for affordable cities to visit in the US. I thought I would expand that to North America, since there are some places in Mexico and Canada that would be affordable and fun to visit! I plan on making this a series, and have asked some guest writers to showcase cities to visit in the US. For today's post, I'm going to start with a well-known place in Canada: Niagara Falls. I've been here many times and have enjoyed it every time. I've been there when it's cold, when it's hot and when it's not. (So winter, summer and fall.) As of right now, $1 is worth $.70 in Canada. So $7 gets you $10 worth of items in Canada. (But don't think they haven't inflated their prices a bit to offset the difference!) There are some parts of Niagara Falls that are WAY too touristy, but there are enough off-the-beaten path places that it makes this an easy-to-reach, semi-affordable, fun destination.
Sunday, January 31, 2016
Travel videos from Chile (mostly Torres Del Paine)
I love taking videos and photographs while we're traveling. I've heard someone say, "I don't like to take photographs or videos. I just like to enjoy my vacation." I get that if you're one of those people that gets easily distracted, but the fact is I actually enjoy taking photographs and videos. It's part of the experience, to me, to document what is happening. Not only do I like doing it while I'm there, but I love watching them when I'm home and reliving the trip. We took a lot of videos on our regular camera, and on the GoPro. I uploaded about eight of them from the hike in Torres Del Paine, as well as a few from Magdalena Island, right outside of Punta Arenas. I thought I would share those for today's post. (I even added some free music to some of them.) Videos range from 13 seconds to 2.5 min. Enjoy!
Monday, January 25, 2016
Reviews and tips for trekking the W in Torres Del Paine

Glaciers. Snow-capped mountains. Turquoise lakes. Rolling green hills. Fresh water that you don't have to filter. What could be more amazing than Torres Del Paine National Park in the Chilean Patagonia? (Click here to watch some of my videos from the trip.)
This was one of the hardest and most rewarding vacations of my life. Five days and four nights, and we hiked the entire "W" portion of the park. I knew it was going to be hard, but I didn't realize just how hard it was going to be. I had trouble finding information on the actual elevation gains of the trek before I went, but after doing it, I can tell you they're pretty high.


(Update: 10:30 a.m. I was able to find a few recordings of the talk uploaded to YouTube. Here's an example of one of their talks, and another one.)
Tips from the talk that we used:
- You need zero-degree rated sleeping bag. It really does get very chilly when you're up in the mountains, and you need a sleeping pad for sure. As the person at the talk said "the sleeping bag rating is for what you won't die at, not what you'll comfortably sleep at.") So the zero-degree will keep you not feeling freezing.
- You need to bring extra cord or guy-lines. Although we didn't stay on it, many of the sites at Cuernos are actually on wooden platforms. So you need extra cord to secure your tent into the wood or it will blow away. It's also very windy in that location. Some of the people we were camping with lost their rainfly because of the wind, so make sure to bring extra cord to secure it down. (There are a lot of rocks around which can help secure the tent down.)
- You can not start a fire anywhere in the park. You HAVE to have a camping stove and fuel, and you HAVE to cook in the designated areas. There are no exceptions to this. We saw people bring questionable ways to cook food, and they ended up having to buy fuel in the park which was overpriced and sold-out at some locations. (We also saw people ignore this rule altogether, which is upsetting, considering 30 percent of the park was just burned by people not following the rules. We even saw someone cooking in their tent, which not only against the rules but extremely bad for you. Can you say carbon monoxide poisoning?)
- Make sure to bring garbage bags to wrap all of your stuff in. We lined our backpack with a garbage bag before putting everything in it. It's an extra secure way to avoid stuff getting wet.
- You have to book free campsites. You can either do that at the CONAF office in Puerto Natales, or when you get to the park. We were told at the park that Italianos was completely booked. However, as we began the hike to Glacier Grey, we stopped by the first office and they have 15 spots they're allowed to give away. If you stop there, they can give you a campsite, even if the first guards tell you there aren't any available. We ended up getting a spot and it was no problem.
- Wear all your layers in the evenings around camp when it's cold and only wear along sleeve shirt while hiking. You heat up quick, and you don't need to wear everything or it will be too hot. If you feel cold with one long sleeve shirt (which you need to wear because you're right under a hole in the ozone layer) and one pair of pants, just start walking. In 15 minutes, you'll be hot. As she said in the talk, "if you feel cold, walk faster."
- If it starts to rain, don't stop and put on a jacket, walk through the rain. We did that and the rain stopped eventually, the wind dried us off, and it was very simple and we never got too cold or wet. Otherwise, you're stopping a lot to remove layers and put layers on.. just keep going. The weather changes so much, it's not worth it to keep stopping and re-regulating your body temp. This was one of the most helpful, practical tips.
- Sleep in merino wool base layers. You don't need to sleep in multiple layers. In fact, you'll be warmer because your body heat will help to heat up the sleeping bag better than trapping all the heat with all that clothing.
Other things we learned after completing the hike:
- When you arrive at the park, a woman comes on the bus and gives you instructions as to what to do. You go in, pay your camp fees, make any additional reservations you didn't do ahead of time and watch a video about park rules. Then the bus drops you off and you begin your trek (west to east) to Glacier Grey. If you're going east to west, the bus will drop you off at the other side. A LOT of people were doing east to west. From what I heard, it really doesn't make much of a difference. You see the same views, it's just what days do you want to see them on? The hike to Torres is the hardest, but I'm glad we did that on the second to last day. I think working up to that hard climb was actually helpful than starting with that, burning out and trying to do another three days. But that's just us! There are strong opinions on both sides, but seriously... it's beautiful regardless.
- The map they give you is very helpful and detailed. It tells you how many hours you can expect to hike for. (It took us about 30 minutes more than the map told us it would take us. We stopped a lot though to take pictures and enjoy the scenery.)
- Showers and water are regulated at the paid sites at refugios. (FYI, it's pronounced rah-fook-e-o, which I didn't realize until after being there.) We woke up early to make breakfast, but the water wasn't turned on until 8 a.m. at the Grey Refugio. There is no running water in the free campsites but they are all near a creek or river. (Although flush toilets are available, but bring your own toilet paper.
- There are no toilets along the trails. With the amount of people that are on the trek and the amount of the forest area that has been burned down, you really are without a bathroom for long stretches of time. Most of the time I tried to hold it, but you're drinking so much water so that's just not available. I brought a bandana and looked for a place that had a little covering and didn't have tons of people walking back and forth (which trust me was difficult) and I used my bandana so I didn't have to worry about packing any garbage out. But on those 5-6 hour long hiking stretches from one spot to the next, you are on your own in the toilet situation.
- You have to pack all your garbage out. There is no where to drop it except for some of the trashcans at PAID sites. There are no trashcans at the free campgrounds. They also have signs up everywhere reminding people. In fact, one of them said, "How many languages do you have to read this in to get it? TAKE YOUR TRASH WITH YOU." So apparently, people still don't listen, which isn't surprising.


Monday, January 18, 2016
Tips for staying fit on vacation

No matter where you're going, if you're sightseeing, you're going to be walking a lot. However, you could cheat and take taxis or try to avoid all the metro stairs, or you could go for it, that way you won't feel bad when you indulge your sweet tooth. I'm all for going for the cakes and baguettes when I'm traveling, but I also know that too much of anything can make you lethargic and end up not really enjoying what you went there to see. Try some of these tips and see if it helps you feel good and healthy and ready to sight see!
Monday, January 11, 2016
Beating the winter blues in your own hometown
I went to Miami last year around this time of the year, and soaked up the rays and enjoyed the peaceful sounds of nature. We stayed right by a river in Little Haiti and enjoyed the peacefulness of ducks swimming. Here's a video of it below. (Don't mind me shouting loudly at the end.)
Traveling to warm places in the dead of winter is most definitely a perk. However, I realized that even when I can't always enjoy beautiful weather, I can enjoy what my great hometown has to offer.
I wanted to share with you some of my tips for getting through the winter blues that I tried out last year. Even though these aren't travel-specific, I think they qualify as at least adventure-specific. Plus, the definition of travel is to go or be moved from place to place. You don't have to go to China to do that. Sometimes it's simply moving from your couch to somewhere you've never been. So, no matter where you live, no matter the weather, here are some of my tips for beating the winter blues.
1. Try out new restaurants. Everyone has been telling you to try out that new place, right? Now is your chance. We have a couple new restaurants opening up right by my work that I can walk to. Make a list of some of the places that you've been wanting to try out, and make it your goal to finally try it out. In Columbus, we have a lot of little gems popping up all over town including cafes and bakeries. Skip Olive Garden this week, and try something new and, I'm going to out on a limb here, but better.

2. See what your downtown night scenes have to offer. Don't let the deterrents of having to find parking stop you from going down and enjoying the town. Some of us get in the winter rut of home and work, home and work, home and work, and end up vegging out on the couch when it gets dark. City lights at night are beautiful. Even if it's cold, bundle up and take a stroll.

3. Cook up your own sunshine in the kitchen. In today's modern world, you can get just about any fruit or vegetable in any season. I know people say it's better to stick with what's in season locally, but oranges and grapefruits from Florida in the winter are one heck of a treat. Try juicing some delicious oranges and listening to your favorite summer tracks. Even if it's snowing outside, you can still get into the sunshine mood.

4. Go outside. (Yes, even if it's cold.) On the coldest day of the year, we decided to bundle up and take our dog for a walk somewhere in nature. I couldn't feel my face, but it was so quiet and serene, you could see the white snow lined and I felt like I was in some arctic world. Yes, it was cold, but it was still fun and beautiful. There are countless scientific studies done on the advantages of being outside and how that affects our minds and moods (Just Google it.) We can become very internal and stressed out when are cooped up inside for days on end. That goes doubly for when it's freezing out, because we sit inside for weeks not seeing the light of day. Don't let the cold scare you. After all, that's why they make hats, coats and gloves.

5. Visit some museums or attend some public programming. There are so many interesting museums, historic homes and programs to visit. We have attended public programming at observatories and the history museums. Columbus Museum of Art has free admission every Sunday, and has an amazing new addition with interesting mirror artwork. Check out what's around you and attend some programs. It's worthwhile to check out other nearby towns and see what museums and programs are available near you. You may be surprised at what you find.

6. Try new forms of exercise. Winter exercise doesn't have to just include going to the gym and running on a treadmill. Try out some new exercise classes like power yoga or cycling. If you have access to a gym with a pool, why not pretend it's summer and take a water aerobics class? Last winter, we went to one of the only traditional 1970s-style skating rinks around in Sunbury, Ohio, where my sister and her family live. Nothing beats putting on your roller skates and falling all over the place on the rink with the disco ball lights flashing on you. But seriously, it's fun to do something inside and sweat even when it's 15 degrees outside.

Monday, January 4, 2016
How to prepare for a hike
Some of the most amazing views that you can see in the National Parks here in the United States or in other parts of the world require a bit of a climbing. If you're looking at a photograph of a place with a dramatic sweeping view of a mountain, chances are that it's going to require you climb up something else to be able to view that.


When we went to Florence, we wanted to climb to the top of the Duomo which is about 450 steps. Now, that seems like nothing, but I was so out of shape that it was painful. I almost said I didn't want to do it at all, but I'm glad my husband forced me to. We have videos of my struggles and having to stop every five seconds to catch my breath. If it weren't for the amount of profanity in the videos, I would post them.
When I went on my second real camping trip, the terrain was flat, but I was struggling. There was no reason for it to feel that difficult, but I just hadn't trained or conditioned for it and thought, "it will be fine." Well, turns out it was actually rather painful and not in a way I was used to. I hadn't learned to push through the pain or know how far I could go before giving up. I had to learn my limits through training. After this trip was when I decided that if we're going to keep doing these camping and hiking trips, I better do some preparation.
I've read a lot of blogs about how to prepare for hiking and what sorts of exercises to do, and I wanted to share with you some tips on what I've been doing to help prepare. Whether you're planning to hike in the Smokey Mountains or the Welsh Coastal Path, you'd benefit from a little conditioning.
 |
| You have to work for this view! |
1. Lift weights. The phrase "no pain, no gain," really applies when considering how much weight you should be lifting. I was so concerned about hurting myself that I would only lift a small amount of weights that I barely strained at all. I also believed this fallacy that to "tone" you only lift a little bit of weight. Well, I lifted a little bit and I didn't see any toning happening. You need to use heavy weights if you want to see results. I lifted what I thought I could for months and never saw any changes. It wasn't until working out with my sister when she said, "Um, you can lift more than that," that I realized that yes, I actually can. After doing weight training, I noticed a huge difference in my stamina when I did cardio. The first hike I did after doing some weight lifting was Angel's Landing in Zion National Park (that's the view right above.) That was challenging, but the weight training really helped.
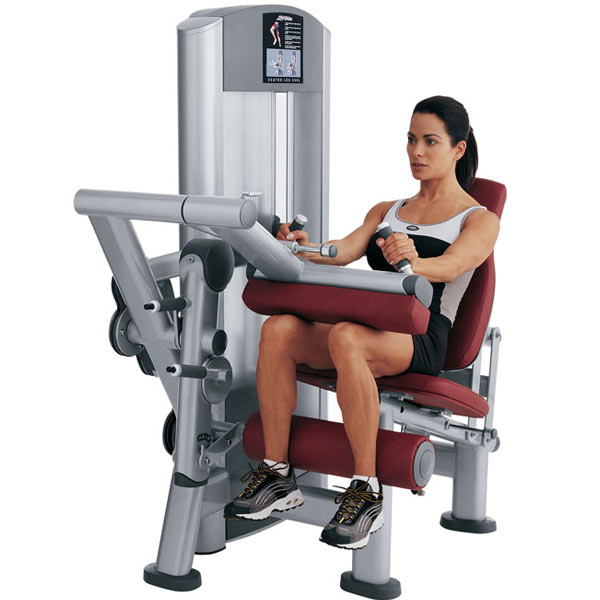
For leg prep, a couple of my favorite machines at the gym are the leg extension and the leg curl. Squats and split squats on the smith machine are also great for building strength in your legs. If you're unsure how to use these, don't be afraid to ask someone. If you're not comfortable with the people at the gym, invite a friend who knows what they're doing to help.
2. Do some free-style exercises. When I'm on my own, I like to mix things up by doing a variety of work-outs that build strength. Lunges around the gym track, or up and down a street, are a great way to make you cry and strengthen the hamstrings. Any kind of squats: regular, plie, sumo, pump or jump. All of those will strengthen the quads. (There are so many kinds of squats, if you do a quick search, you'll find all sorts of variations.)
A combination I really like is to set a timer for 20 minutes and do 15 push-ups, 15 squats, 15-lunges and run a lap, and repeat as many times as I can for that 20 minutes.
3. Take group fitness classes. Skip the treadmill, and go to a fitness class that will force you to do way more than you would on your own. Classes like boxing, cycling or Crossfit can push you further than you'd imagine. The kind where your legs feel like they're going to give out (or actually do give out.) If you feel like you're dying, don't worry, you're not. One cycling class I took, the instructor said, "When you can't go any further, just go ahead and keep going." Try out some classes and see what you enjoy the most. These types of classes are good for cardio and help you mentally realize that you're capable of much more than you think you can. Your mind gives up faster than your body and sometimes you just need a little encouragement from an instructor or others in the class.
4. Take the stairs. The StairMaster is a great way to get your legs conditioned for what you're about to do to them. If you don't have access to that type of machine, you can also find somewhere to go with lots of stairs around your area. In our area, we have two large dams with lots of stairs that you can run up and down. You can always do stairs at your house, or find an apartment building with lots of floors and run up and down the outside stairs. Stairs really prepare for the climb up.
For an added challenge, try running on the treadmill while it's off for 10 seconds, break for 10 seconds, and do it two more times. (If you're thinking, "piece of cake," just try it once.)
5. Prepare for the descent (downhill hiking.) If you have a heavy pack on, it can be challenging to not slip and wobble all over the place when going downhill. Hiking poles can assist with this as well. If you're working on strength and weight training that will be helpful because the stronger your legs are, the more durable you'll be. But you still want to practice with a pack on to see how you do. Try putting a pack on and walking down the stairs to see if your legs are ready for the descent.
5. Prepare for the descent (downhill hiking.) If you have a heavy pack on, it can be challenging to not slip and wobble all over the place when going downhill. Hiking poles can assist with this as well. If you're working on strength and weight training that will be helpful because the stronger your legs are, the more durable you'll be. But you still want to practice with a pack on to see how you do. Try putting a pack on and walking down the stairs to see if your legs are ready for the descent.
I hope these tips will help you get in shape for your next hike. I know that I've never been disappointed when I've pushed myself, but I have been disappointed when I was unprepared and unable to really enjoy what I was doing. Get out there and push yourselves so you can see those awe-inspiring views!
Shout out to my sister and boxing trainer who have pushed me to my limits. You made me throw up, you made me cry, but you also helped prepare me to do what I really want to do: see the views on top of a mountain.
Subscribe to:
Comments (Atom)